When you save presentation as a PDF file it freezes the formatting and layout. People can view the slides even if they don’t have PowerPoint, but they can’t make changes to it.
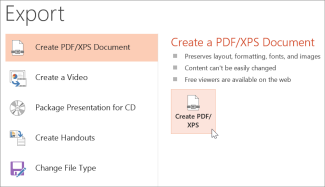
- Select File > Export.
- Select Create PDF/XPS Document, then select Create PDF/XPS.
- In the Publish as PDF or XPS dialog box, choose a location to save the file to. If you want it to have a different name, enter it in the File name box.
- Optionally, if you want to change what the final PDF file is like, do any of the following:
- At Optimize for, select Standard for higher quality (for example, if you want to print it). Select Minimum size to make the file smaller (for example, if you want to send it as an e-mail attachment).
- Select Options to set how the presentation will appear as a PDF. Here are some of the available options:
- To save the current slide only as a PDF, under Range, select Current slide.
- To save specific slides as PDF, in Slides(s), enter the slide number range in From and To boxes.
- If you don’t want to save slides, but instead only save comments, handouts, or Outline view, under Publish what, select an appropriate option. You can also specify the number of slides to appear in Slides per page dropdown box, and modify the order (Horizontal or Vertical).
- You can choose to include frame slides, hidden slides, comments, ink, non-printing information such as Document properties or Document structure tags, in your PDF by selecting the appropriate options.
- Select OK.
- Select Publish.
- Select Share, then Share again.
- If your presentation isn’t already stored on OneDrive, select where to save your presentation to the cloud.
- Choose a permission level, like Anyone with a link, or maybe just people in your company. You can also control if people can edit or just view the doc.
- Select Apply.
- Enter names and a message.
- Select Send.
- You can also copy the link and then paste it in an email, social media post, or even a text message.
For info on collaborating with others on a document, see Work together on PowerPoint presentations.
To stop sharing, see Stop sharing OneDrive files or folders or change permissions.
Share by using a traditional email attachment:
If you don’t want to share a document with others to collaborate on, simply use a traditional email attachment to send the presentation to others.
From OneDrive for Business or SharePoint, share a PDF or copy of a presentation by email
This feature is only available if you have a Microsoft 365 subscription. If you are a Microsoft 365 subscriber, make sure you have the latest version of Office.
- To send your presentation as a copy or a PDF, select Share.
- In the Share dialog box, under Attach a copy instead, select either PowerPoint Presentation or PDF.
- PowerPoint will open the email application and attach the file to a new message. Enter the recipients details and a short message and select Send.

From OneDrive, share a copy of your presentation by email
This feature is only available if you have a Microsoft 365 subscription. If you are a Microsoft 365 subscriber, make sure you have the latest version of Office.
- To send your presentation as a copy, select Share.
- In the Send link pane, set share permissions, enter a Name, group, or email, enter a Message if you’d like, then select Send.
Add, change, hide, or delete comments in a presentation
Applies To
Use comments when you want people to review and provide feedback on a presentation that you created, or when colleagues ask for your feedback on a presentation. A comment is a note that you can attach to a letter or word on a slide, or to an entire slide.
PausedWindowsmacOSWebOffice for AndroidOffice for iOS
Add a comment
- Select the object or slide you want to comment on.
- Select Review and choose New Comment. If the Comments pane is open, select New. Or on the Insert tab, select Comment.
- In the Comments pane, type your message in the box and select Post or press Ctrl+Enter.
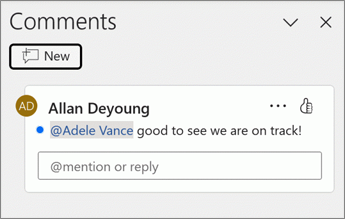
Tag someone in a comment
When you comment on a document or presentation and use the @-sign with someone’s name, the person you mention receives mail with a link to your comment. For more details, see Use @mention in comments to tag someone for feedback.
Show or hide comments
- On the View tab, select Normal.
- On the Review tab, select Show Comments.
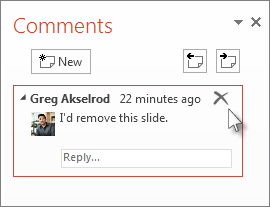
View and reply to comments
- Select the comment in the Comments pane.
- Select Reply to respond to a comment.
The blue dot next to a comment indicates it’s a new comment or a new reply since you last viewed them.
Edit comments
- In the navigation pane, in Normal view, select the slide you want to comment on.
- In the Comments pane, select the comment to edit, and then select
Edit comment to make changes.
Note: Keep in mind that it’s possible for others to edit your comments. Comments in a Office document are stored in the file, so anyone with edit access to your file can edit your comment.
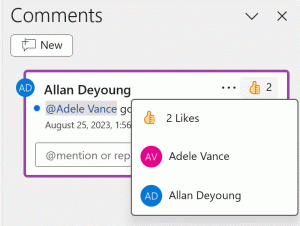
React to a comment
- To show your support to a comment, select the
Like button at the top right corner of the comment and turn the button yellow.
- To see who reacted to the comment, hover over the
- To remove your own reaction, select the
Delete a comment
- In the Comments pane, select the comment to delete.
- Select More thread actions (…) and choose Delete thread.
Track changes in your presentation
Applies To
Important:
- We will retire the Compare and Merge feature from Microsoft 365 PowerPoint app for Windows version 2502. The feature will be unavailable from version 2502 onward, but it will remain available in earlier versions. Existing files will not be affected.
- We recommend using real-time online collaboration tools instead. Learn more about working together on PowerPoint presentations.
- The Compare and Merge feature is not available in Microsoft 365 PowerPoint for Mac or Microsoft 365 PowerPoint for the web.
Use the Compare tool in PowerPoint to compare and merge two different versions of a file.
In a collaboration scenario, you could send a review copy of a presentation to other people, collect their changes and comments in that copy, then use the Compare tool in PowerPoint to compare and merge the review copy with your original file. These steps are described in detail below.
Step 1: Send your presentation for review
Before people can review your presentation, it’s a good idea to save the original copy, and then post a second copy for them to review. Saving the original will give you something to compare changes with when everyone’s done reviewing.
- Create a draft of the presentation and save a hard copy.
- Save another copy of your presentation with a different name to a shared location, such as OneDrive or SharePoint.
- In OneDrive or SharePoint, right-click the file and select Copy link to get a link you can send in email to your reviewers.
- Ask reviewers to add comments to your slides and to add their feedback to the presentation.
Step 2: Compare and merge two versions of the same file
When everyone is done reviewing the presentation you shared, you can review the changes and merge it with the copy you saved of the original.
- Open the original version of the presentation that you saved on your computer.
- Click Review > Compare, and then click Compare.
- In the Choose File to Merge with Current Presentation box, find the version of your presentation that you saved to the shared location, click it, and then click Merge.Note: The Revisions task pane opens to display all comments and changes made by reviewers.
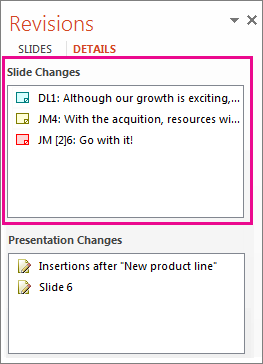
- If reviewers left comments in your presentation, you’ll see them under Slide Changes in the Revisions task pane.
- To read the comments in detail, at the bottom of the PowerPoint window, on the status bar, click Comments.Note: For details about working in the Comments task pane, see Tips for working in the Comments task pane below.
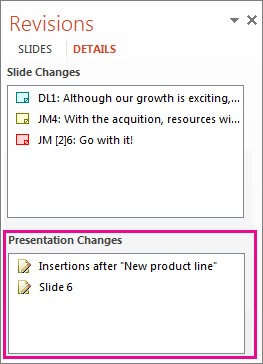
- If reviewers made changes to your presentation, you’ll see them under Presentation Changes in the Revisions task pane.
- To see the details about a change in the body of the slide, click each list item.
Accept or reject changes made by others
To accept or reject a change made by a reviewer, do the following:
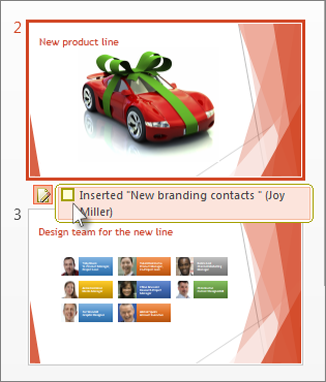
- To accept a change, check the box next to the Other authors
icon (also shown below).
- To reject a change, do nothing. Boxes that aren’t checked won’t be added to the presentation.

Tips for working in the Comments task pane
- On a slide you’ll see a Comments icon
when someone has left a comment. Double-click the icon to read the comment.
- Click Next
to move to the next comment and click Previous
to move to the previous comment.
- To delete a comment, move your pointer over the comment and click Delete
.