Add, rearrange, duplicate, and delete slides in PowerPoint
When creating your presentation, you’ll typically add new slides, move your slides around, and delete the slides you don’t need.
Add slides
- Select the slide you want your new slide to follow.
- On the Home tab, select the arrow by New Slide.
- Select a layout.
- Select the text box and type.
Delete slides
- For a single slide:
Right-click the slide in the thumbnail pane on the left, then select Delete Slide. - For multiple slides:
Press and hold Ctrl, and in the thumbnail pane on the left, select the slides. Release the Ctrl key. Then right-click the selection and choose Delete Slide. - For a sequence of slides:
Press and hold Shift, and in the thumbnail pane on the left, select the first and last slides in the sequence. Release the Shift key. Then right-click the selection and choose Delete Slide.
Duplicate a slide
In the thumbnail pane on the left, right-click the slide thumbnail that you want to duplicate, and then click Duplicate Slide. The duplicate is inserted immediately after the original.
Rearrange the order of slides
- Move a single slide:
In the pane on the left, click the thumbnail of the slide that you want to move, then drag it to the new location. - Move multiple slides:
Press and hold Ctrl, and in the pane on the left, click each slide that you want to move. Release the Ctrl key, and then drag the selected slides as a group to the new location.
Change the page orientation in PowerPoint between landscape and portrait
Applies To
PowerPoint slides are automatically set up in landscape (horizontal) layout , but you can change the slide orientation to portrait (vertical) layout
PausedWindowsmacOSWeb
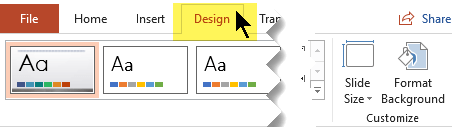
- Select the Design tab:
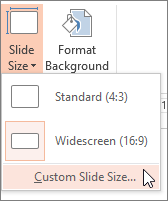
- Near the end, select Slide Size, and then select Custom Slide Size.
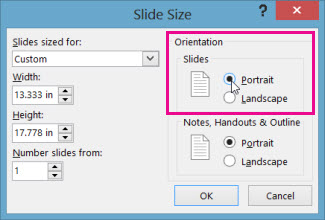
- In the Slide Size dialog box, select Portrait, then select OK.
- In the next dialog box, you can select Maximize to take full advantage of the space available, or you can select Ensure Fit to make sure that your content fits on the vertical page.
Curve text around a circle or other shape
Applies ToWindowsmacOSWeb
You can use WordArt with a Transform text effect to curve or bend text around a shape. If you want the text to circle the shape, you can also do this, but it’s a little bit more work. You can also insert WordArt multiple times to wrap text around shapes with straight edges.
- On the Insert tab, select
WordArt, and pick the WordArt style you want.Note: The WordArt icon is located in the Text group, and it may appear different depending on the version you’re using and the size of your screen.
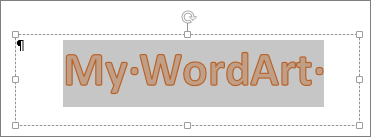
- Replace the WordArt placeholder text with your own text.
- Select your WordArt text.
- On the Shape Format tab, select
Text Effects, choose
Transform and pick the look you want.
Advanced techniques
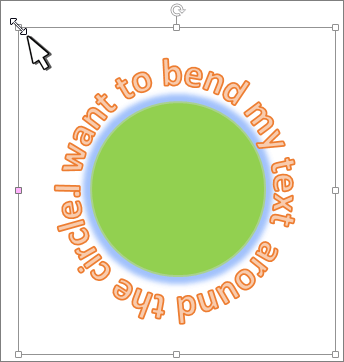
Wrap around a circle
- On the Shape Format tab, select
- Select Circle under Follow Path, and drag any of the sizing handles until your WordArt is the size and shape you want.
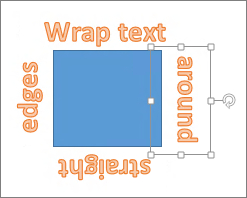
Wrap around straight edges To wrap text around a shape that has straight edges, such as a rectangle, insert WordArt objects for each edge. In this example, WordArt is inserted four times, one for each side of the shape.
Group moves and copy To move or copy multiple WordArt objects as a single shape, see Group or ungroup shapes, pictures, or other objects .
Precise angle control You can control the angle of your WordArt text in relation to your shape with precision by using the Rotate tool.
If you need very precise control or are creating a complex combination of shapes and text, you’ll want to use a third-party drawing or graphics program to create the text around your shape and then copy and paste it into your Office document.
Note: You can use Text Effects with Wordart or a regular Text box.
Add a hyperlink to a slide
Applies ToWindowsmacOSWebOffice for iOSOffice for Android
The fastest way to create a basic web hyperlink on a PowerPoint slide is to press Enter after you type the address of an existing webpage (such as http://www.contoso.com).
You can link to a webpage, or you can link to a new document or a place in a existing document, or you can begin a message to an email address.
Link to a website
- Select the text, shape, or picture that you want to use as a hyperlink.
- Select Insert > Link > Insert Link.
- Select Existing File or Web Page, and add the:
- Text to display: Type the text that you want to appear as hyperlink.
- ScreenTip: Type the text that you want to appear when the user hovers over the hyperlink (optional).
- Current Folder, Browsed Pages, or Recent Files: Select where you want to link to.
- Address: If you haven’t already selected a location above, insert the URL for the web site you want to link to.If you link to a file on your computer, and move your PowerPoint presentation to another computer, you’ll also need to move any linked files.
- Select OK.
Link to a place in a document, new document, or email address
- Select the text, shape, or picture that you want to use as a hyperlink.
- Select Insert > Link > Insert Link and select an option:
- Place in This Document: Link to a specific slide in your presentation.
- Create New Document: Link from your presentation to another presentation.
- E-mail Address: Link a displayed email address to open up a user’s email program.
- Fill in the Text to display, ScreenTip, and where you want to link to.
- Select OK.
Change the color of a hyperlink
- Select the hyperlink you want to re-color.
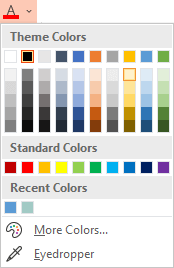
- On the Home tab of the ribbon, select down arrow next to the Font Color button to open the menu of colors.
- Select the color you want for the hyperlink.
Test the hyperlink
Once you’ve inserted the link, you can test it (in Normal view) by right-clicking the hyperlink and selecting Open Hyperlink.
Show and return
The Show and return box is grayed out unless you are linking to a Custom Show in your presentation.
If you’re a Microsoft 365 subscriber and want to use a feature like show and return, click here to read about linking to another slide by using Zoom for PowerPoint, and see the “Choose to return” feature discussed near the end of that article.
Format text as superscript or subscript
Applies To
You can set a text character slightly above (superscript) or below (subscript) the normal baseline of type:

For example: When you add a trademark, copyright, or other symbol to your presentation, you might want the symbol to appear slightly above the rest of your text. If you’re creating a footnote, you might also want to do this with a number.WindowsmacOSWeb
Keyboard shortcuts: Apply superscript or subscript
To make text appear slightly above (superscript) or below (subscript) your regular text, you can use keyboard shortcuts.
- Select the character that you want to format.
- For superscript, press Ctrl, Shift, and the Plus sign (+) at the same time.For subscript, press Ctrl and the Equal sign (=) at the same time.
You can also format text as superscript or subscript by selecting options in the Font dialog box, as described in the next procedure.
Apply superscript or subscript formatting to text
- Select the character that you want to format as superscript or subscript.
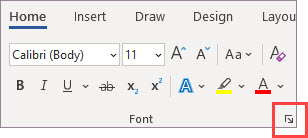
- On the Home tab, in the Font group, select the Font Dialog Box Launcher.
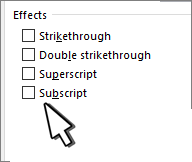
- On the Font tab, under Effects, select the Superscript or Subscript check box.
Tip: You can make text superscript or subscript without changing the font size. For superscript, enter a higher percentage in the Offset box. For subscript, enter a lower percentage in the Offset box.
Undo superscript or subscript formatting
To undo superscript or subscript formatting, select your text and press Ctrl+Spacebar.
Insert a superscript or subscript symbol
- On the slide, click where you want to add the symbol.
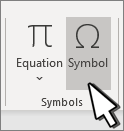
- On the Insert tab, select Symbol.
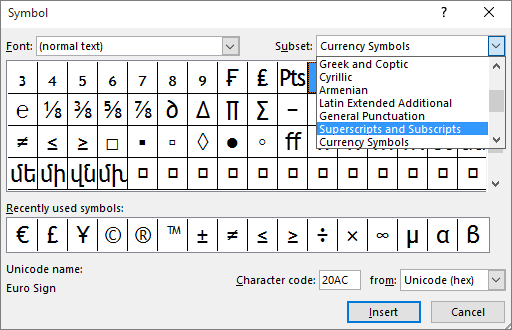
- In the Symbol box, in the Font drop-down list, select (normal text) if it isn’t already selected.
- In the Symbol box, in the Subset drop-down list, select Superscripts and Subscripts.
- In the Symbol box, select the symbol you want, press Insert, and then select Close.
Change the color of hyperlink text throughout a presentation
Applies To
You can systematically change the color of all hyperlink text in your PowerPoint presentation.WindowsmacOS
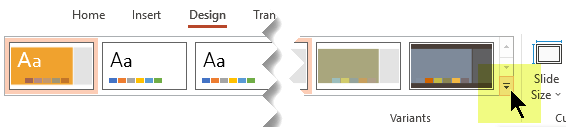
- On the Design tab, in the Variants group, select the down arrow that opens the gallery of color variants:
- Select Colors from the drop-down menu, and then click Customize Colors at the bottom of the menu.
The Create New Theme Colors dialog box opens.
- In the Create New Theme Colors dialog box, under Theme colors, do one of the following:
- To change the color of hyperlink text, click the arrow next to Hyperlink, and then select a color.
- To change the color of followed hyperlink text, click the arrow next to Followed Hyperlink, and then select a color.
Tip: For additional color choices, click More Colors.
- Click Save.
Beginning with PowerPoint 2016, you can also change the color of an individual hyperlink by directly using the text color control. See Add a hyperlink to a slide for more information.